
Shetland Islands · Scotland
Bath & shower resealing (mastic) in Sandwick, Shetland Islands
Bath resealing across Sandwick and nearby, generally in one visit.
- Stained silicone
- A messy previous reseal
- Sealant that’s split or lifting
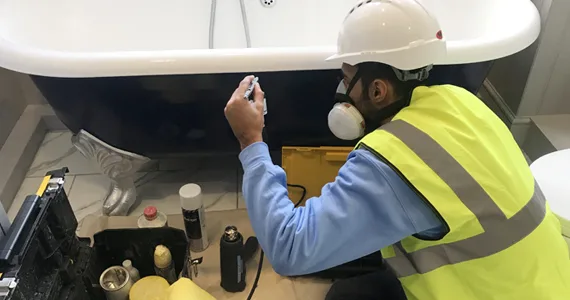
Bath resealing in Sandwick, done in place
A proper reseal starts with removing every trace of the old silicone. New silicone will not bond to old, which is why many DIY jobs peel. If you’re dealing with missing sealant behind the taps and gaps in the seal, we can normally put it right, whatever the material.
Big or small, it’s backed by a one-year guarantee.
- Location
- Sandwick (ZE2)
- Region
- Shetland Islands
- Cover
- A year, on every repair
- Quote
- Fixed and free, based on photos
- Call
- 0345 017 0787
- Last updated
- 23 October 2026
Resealing in Sandwick: why it matters
Compared with repairing water damage, resealing is cheap. It’s a quick job that protects your walls and floors. Instead of hourly rates, we fix the price before we start. Damage, material and access decide it.
Why book with us
- We leave the room as we found it
- Honest advice, even when it means no job
- Most jobs done in one visit
- Everything repaired in place
Take a look at our full price list.
Landlords, agents and businesses in Sandwick
We also carry out snagging repairs for builders and developers, fixing chips and scratches before handover so nothing needs replacing. We’re CHAS, Constructionline and SafeContractor accredited.
We work for landlords, letting agents and housing providers in Sandwick as well as householders. Repairing between tenancies keeps void periods short, and it costs much less than replacing.
DIY kit or professional repair?
A kit can be fine for a tiny mark out of sight. For damage in plain view, cracks, holes or rust, or coloured finishes, a professional repair is worth it.
If you’ve already tried a DIY fix, that’s fine. We take the old repair out and do it properly, so it doesn’t stop a professional repair. It does add a little time, so tell us about it when you send pictures.
How to care for the repair
Once the work has cured, treat it gently:
- Ventilate the bathroom well
- Open a window after bathing
- Keep the joints dry
- Clean the sealant gently and regularly
Keep the room well ventilated, and dry the joints after bathing.
If you notice damp, stains on the ceiling below or loose tiles, act quickly. There may be more going on, so we will tell you if it needs a builder or plumber.
What your bath or shower is made of matters
Shower trays
Trays are sealed with weight on them, for the same reason.
Baths
Baths are resealed with water in them, to open the joint fully.
Prices and what affects them
We price every job individually. What matters most is:
- The material and finish
- Whether it’s a chip, crack, burn or wear
- The colour and finish to match
- Previous DIY repairs that have to come out
A repair generally costs much less than people expect, especially compared with replacing and refitting. Send pictures and we’ll give you the exact figure.
Getting a price from photos
Most quotes are done from photos alone. To make it quick:
- Good light, ideally daylight, without flash glare
- Where you are, by postcode
- Whether it’s been repaired or coated before
- A coin or ruler next to the damage for scale
A quote takes minutes to ask for: photograph the damage, then the entire bath or shower, include your postcode and send them over. You will get a fixed quote, not an estimate.
Sandwick and nearby
Sandwick is about 14 miles north of Lerwick, in the Shetland Islands. We work in every kind of home, from flats and terraces to detached houses and new builds, plus businesses and rented homes. Sandwick is one of 63 places in the Shetland Islands we cover.
Every address in ZE2 is covered, from the main roads to the quietest streets. Whether you live on Rocky Road, Saeter and Harlsdale or a nearby road, we can come to you. Neighbouring places we cover include Clate (1 mile south), Symbister (1 mile north-east), Hamister (1 mile north), Huxter (1 mile east) and Tripwell (2 miles north-east). Within a short drive, we also cover Lerwick (14 miles south), Sound (14 miles south) and Brae (12 miles west). Some remote addresses need extra planning, so it’s best to call first.
Local landmarks in Sandwick
Green spaces nearby include Ward of Clett and Loch of Sandwick.
Questions from Sandwick
Do the materials smell?
Expect a mild smell while we’re working that clears as it cures.
Are there extra charges for Sandwick?
No. Our quotes include travel, and we charge the same wherever you are.
Will the price change on the day?
It’s rare, but if it happens we talk to you first. You decide whether to go ahead.
Why does my sealant keep going mouldy?
Mostly moisture and poor ventilation. Mould-resistant silicone and good ventilation help.
Will it make a mess?
No. The work area is masked and covered, and we leave the room clean.
Can new silicone go over old?
All the old sealant comes out. Fresh silicone does not stick to old.
Do you work for landlords and businesses?
Yes, frequently. We quote for multiple addresses and fit around tenancy changeovers.
How do I get a price for bath resealing in Sandwick?
Because every job differs, we price from pictures. You’ll get a fixed figure before you book.
More services for Sandwick
When we’d advise against a repair
Honesty matters more than a booking, so here’s what a repair can’t fix:
- Loose tiles, which need refixing first
- A flexing bath
- Gaps too big for silicone alone
Not sure? Send pictures and we’ll give you a straight answer.
Surfaces we repair
- Basins & vanity units
- Baths
- Kitchen worktops & sinks
- Wet rooms
- Shower trays & enclosures
The process
Nothing needs to be moved out of the room. We bring everything we need with us, put protection down and start once you are happy with the plan. It generally takes around two hours, and you’re welcome to carry on with your day while we work.
- We protect the area and mask the joint lines.
- We remove the old sealant and every trace of residue.
- The joint is cleaned, treated and dried.
- Fresh silicone is applied in a continuous bead.
- The bead is smoothed, the tape removed and the seal left to cure.
Getting ready for the visit
- Point us to the nearest place to park
- Mention if the room is upstairs or in a flat
- Let the surface dry out before the visit
Get a quote
For most jobs, photos are all we need to give you a price. Tell us what happened and where you are, and we’ll reply with a fixed quote and the earliest dates we have.
Read more


About our accreditations · Every repair comes with a one-year guarantee.
